| Your browser is not supported. | ||
|
Please browse our site using any of the following options:
| ||
An Adventurer's Guide To Hiking The Larapinta

We have road tripped to Australia's Red Centre four separate times and fallen in love with the harsh beauty, the endless expanse of red-coloured country and the wide open spaces. This time however, we wanted to experience it in a different, more intimate way. What better way to truly appreciate the heart of our country than by walking on our own two feet through 230km of ancient mountain ridges and deep gorges that stretch along the Larapinta Trail. There is something incredibly spiritual and humbling about walking on traditional Arrernte land, across the world's oldest river, The Finke River. The trail is actually named after this ancient river, or Larapinta in the Arrernte language (pronounced Ah-runda). This is arguably one of Australia's best multi-day hikes and we wanted to experience it for ourselves, so we set out in the coldest month of July to traverse this rugged terrain.
Our longest previous multi-day hike was only four days long, so we knew that to do the entire trail would be a challenge and a huge achievement. The Larapinta can in fact be broken up into 12 sections and be tackled one at a time or done as the full 230km trail. Before setting off, we first needed to be sure we had quality gear that would protect us from the elements, enough food and water, and of course that we would be able to walk the distance day after day.
This personal account of our trek on the Larapinta Trail will provide many tips on the planning of the expedition as well as give away our favourite campsites on the trail. We discover the magic of a desert sunset and sunrise experienced each day on the trail and then go to bed under a carpet of stars that stretch from horizon to horizon.
Larapinta Trail Vitals
Total Distance: 230km one way
Total Number Of Days To Complete: 12 - 17 days
Start: Alice Springs Telegraph Station (East to West) or Redbank Gorge (West to East)
Sections: 12 separate sections
Shortest Section: #10 at 8.9km
Longest Section: #6 and #9 both at 28.9km
Favourite Section: Counts Point in section 9
Highest Elevation: Mt Sonder (Rutjupma) - 1,379m
Planning Overview
When deciding to complete the Larapinta Trail there is some serious planning that is required. It needs to be decided which direction you would like to undertake the trail - east to west as the maps describe it, or west to east. We decided east to west seemed easier logistically for us, having no time restrictions.
We had little choice in when to undertake the hike, as July was when we were driving through the Red Centre. Luckily for us our timing was impeccable as July is in the heart of the peak season. It is worthwhile considering the seasons, with peak season being the winter months, between May and August. The days are sunny and in the mid 20's (Celsius) but beware as the nights can drop below 0°. The daytime temperatures in the summer months (between September and April) can soar into the 40's and therefore it is a much less popular and more arduous time to hike the trail.
With the dramatic temperature differences between night and day, it was important that we had good quality camping and hiking gear. The majority of our gear was from Mountain Designs and accomplished the fairly difficult task of keeping us warm, dry and comfortable throughout. See below for a full list of our gear that we packed for the Larapinta.
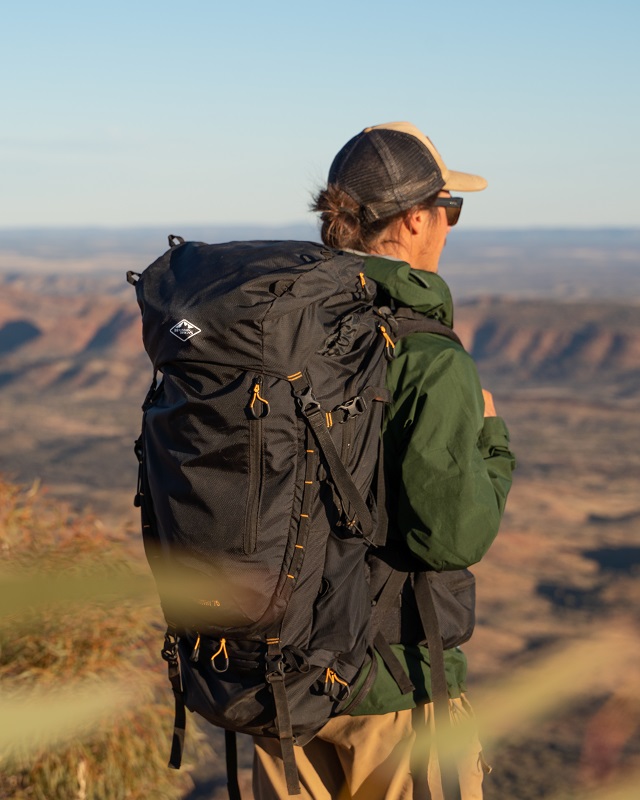
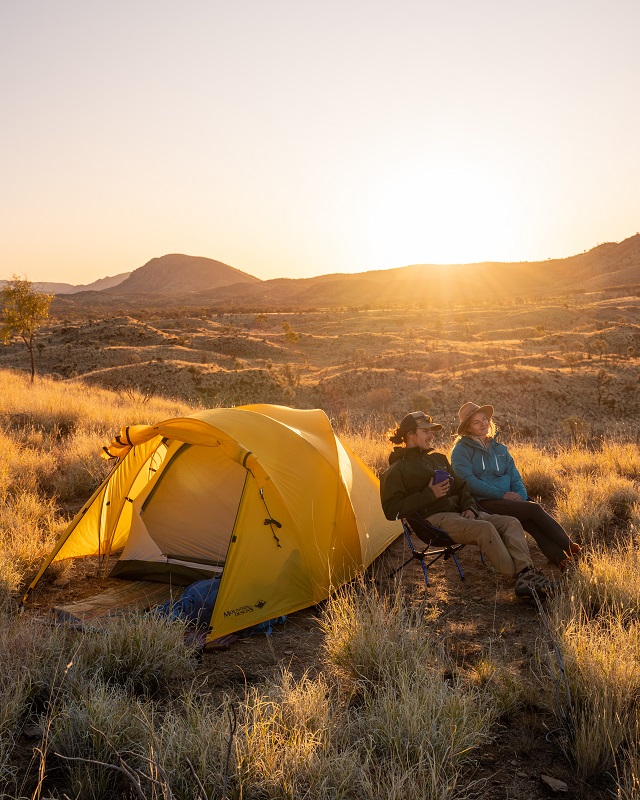
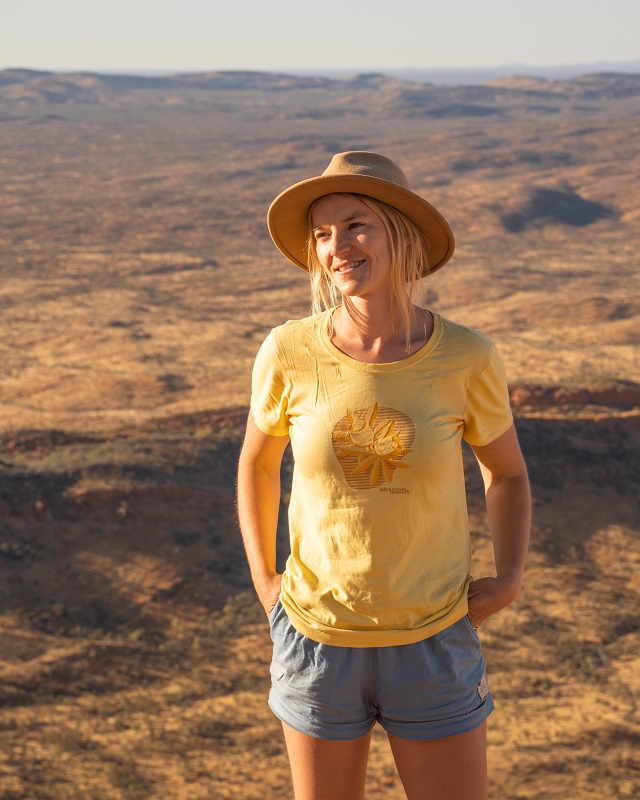
Our Mountain Designs gear offered the perfect combination of the comfort, functionality and durability required to complete the Larapinta trek. (Images courtesy of All About Adventure)
How Do You Book The Trail & What Does It Cost?
If you intend on hiking the trail independently of a tour company, then it needs to be booked in advance including camping for each night and can be done on NT Parks website. We were pleased to find it had not booked out when we booked only a month in advance, but each year can be different. Around 5,000 walkers attempt the Larapinta Trail each year, a number that has been growing since its completion in 2002. We calculated first approximately how many kilometres we would like to do each day and then paid for 14 nights camping to allow for that. The number of nights varies greatly depending on how much time you can allow - anywhere from 12 up to 17 nights. Based on our walking experience we chose to do 15 days/14 nights.
The trail cost to do it independently of a tour group is $12.50 per person per night but is capped at $125 per person. The camping is on top of the walking fee and is around $6 per person per night excluding a few of the privately-owned campsites such as Standley Chasm. The total cost for camping including the walking fee was $406 for the two of us over 14 nights. We booked specific campsites the whole way along, but we were able to be very flexible once on the trail and changed it as we went. This seemed to be what most people on the trail were doing, as you don't book a numbered site. These fees go directly to Parks and Wildlife and allow them to maintain the track, shelters and water tanks. Alternatively, there are many companies that offer tours with varying degrees of assistance if that is your preference.
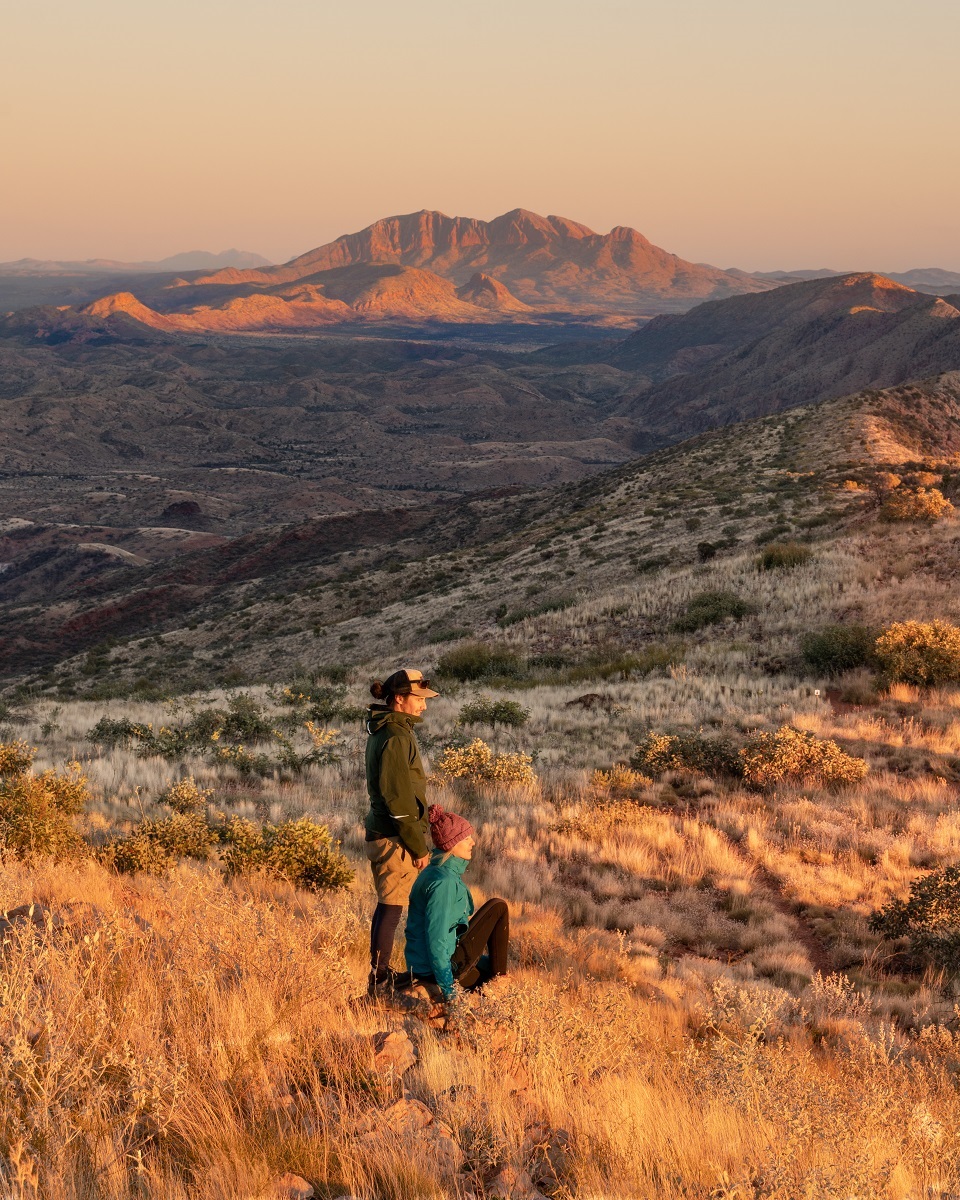
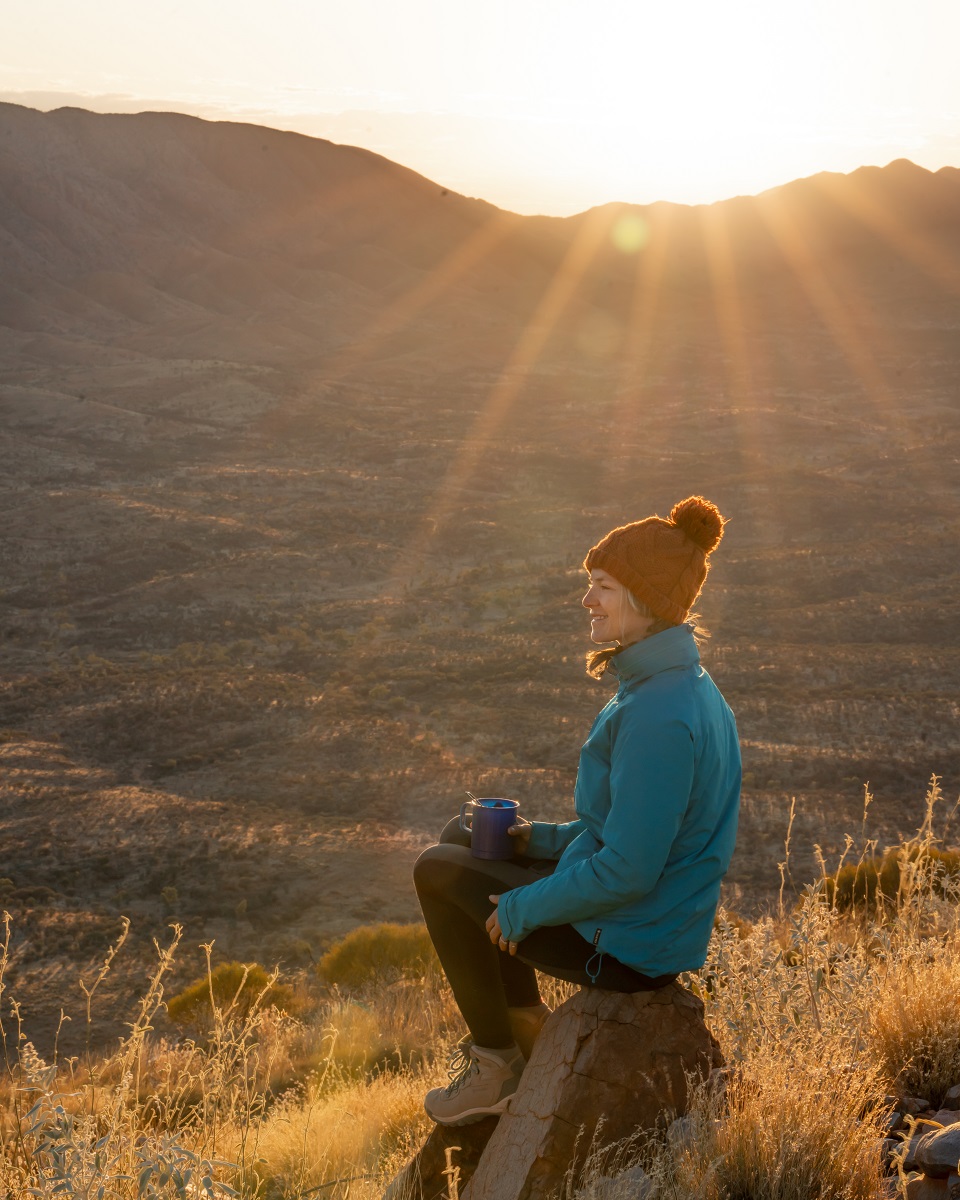
From mountain tops and gorges, to dazzling sunrises and sunsets, the scenery never ceased to amaze us. (Images courtesy of All About Adventure)
Another important consideration for the itinerary also needs to be the water fill points along the way at the various trail shelters. Keep reading for more detailed information about the water along the trail. It took us by surprise that many people chose to walk the trail from west to east. We soon learned it was because it gives more flexibility to change plans and the number of days without having to change the transfer date, as when ending in Alice Springs you won't need to organise a transfer ahead of time. Transfers with a company cost anywhere upwards of $350 one way to or from Redbank Gorge and so we decided to risk it and hitch a ride back from Redbank Gorge, which left us with the flexibility to take more or less time as we saw fit.
What To Expect On The Trail
The hiking itself is difficult, in that the terrain is constantly uneven, ranging from very sharp, hard rocks to large boulder hopping or even soft sand in dry creek beds. The sections vary from moderate to difficult and some days the elevation gain is around 500-600m. We recommend sturdy shoes with plenty of grip, however the lighter the better as you are wearing them all day and the weight needs to be a consideration. Good quality trail runners seemed to be a good choice in our opinion, though the trail is notoriously hard on shoes so they need to be as sturdy as possible.
The landscape varies and has a surprising amount of flora and fauna, though they are more subtle than their rainforest or coastal counterparts. Often it is only birds or the occasional small dragon that we would see during the day, however towards dusk or dawn you can spot black-tailed rock wallabies in the rocks or dingoes looking for food near the waterholes. We were lucky enough to spot nine new bird species including the Dusky Grass Wren as well as some of our previously seen favourites such as budgies and painted finches.
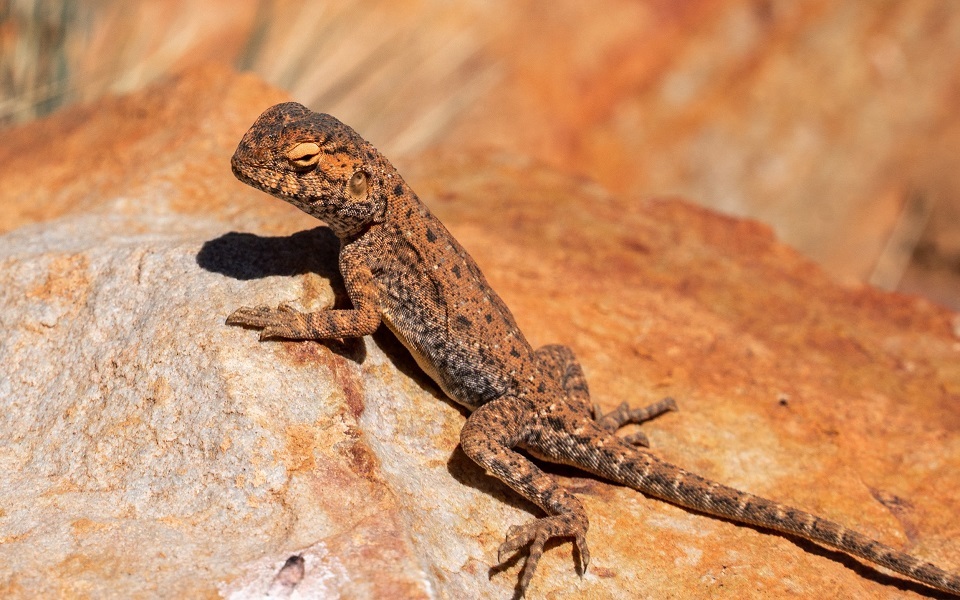
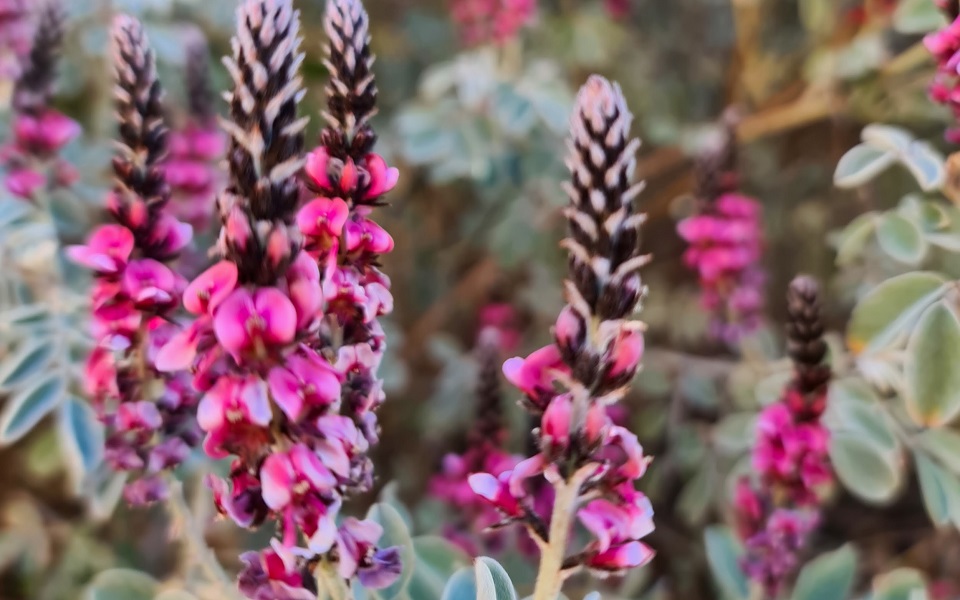
The remarkable and very camouflaged wildlife along the trail (left), along with the flora that has found a way to survive the harsh conditions for millions of years, such as Basedow's Indigo (right). (Images courtesy of All About Adventure)
Geologically this is one of the most fascinating areas, with the Chewings range on the first half of the hike being over 1.8 billion years old. Red Quartzite dominates this landscape and dazzled us every sunrise and sunset when it would glow as if from within with a fiery red. The ancient rivers have cut through the ranges, almost always north to south and have created a myriad of chasms, gorges and semi-permanent waterholes. Some plants still remain from the bygone era when temperate rainforests prevailed (such as the incredibly unique palm-like Macdonnell Cycad). We were always impressed to see desert flowers such as the endemic Mountain Hakea growing, their delicate beauty showcasing such strength and resilience.
Hits & Tips For Planning To Thru-Hike The Trail
Food Drops
To avoid carrying 14 days' worth of food the trail creators have factored in four spots that you can do food drops. These are located at Standley Chasm, Ellery Creek South, Serpentine Gorge and Ormiston Gorge. There are two ways to organise these food drops which is to pay a company to arrange it or prepare them yourself. If, like us, time is not an issue then we recommend arranging the drops yourself as it is part of the excitement of starting out on the trail.
To do this you will need to pick up a key from the Alice Springs Visitor Centre and pay $10 plus a $50 deposit. The Visitor Centre can also help with arranging transfers if needed. The key will allow you entry to each of the food drops, except Standley Chasm, which is not in a locked room and because it is privately owned you will have to pay $5 direct to the kiosk there.
We had three food drops at Standley Chasm, Serpentine Gorge and Ormiston and thought that worked quite nicely with the number of days we were on the trail. Our food drops consisted of meal and snack supplies to last until the next food drop, as well as extras such as sunscreen, toothpaste, gas for our cooker and maps for the next sections. We also put in some treats, usually things that were too heavy to carry but that we could enjoy at the food drop and then leave behind. Jamie also put a spare pair of shoes in the first food drop as the ones he was starting out in had given him some blisters a week previously.
We added some clean shirts, underwear and socks to swap out with our dirty stuff as well. One thing we wish we had added to the food drop would be a 240V USB adaptor so that we could have gotten an extra bit of charge in our phone and camera batteries at each food drop stop. Our tip would be to put extra treats in and mix it up in each drop, after all can you ever have too many treats when you're hiking? Even if you can't eat them you can leave them back in your container or share them with your new trail friends.
Unfortunately, the Larapinta has been having problems with mice along the trail and in particular at the food drop locations. To combat this, it is important to put your food drops into a sturdy plastic container and make sure it is well sealed. We would recommend arriving into Alice Springs 2-3 days prior to your trail start date if you are arranging your own food drops as the shopping, compiling and packing as well as driving out to the food drops does take considerable time. The other option is of course to hire a company to arrange them for you. There are a few companies and they charge from $80 per food drop and you will still need to pack your own container.
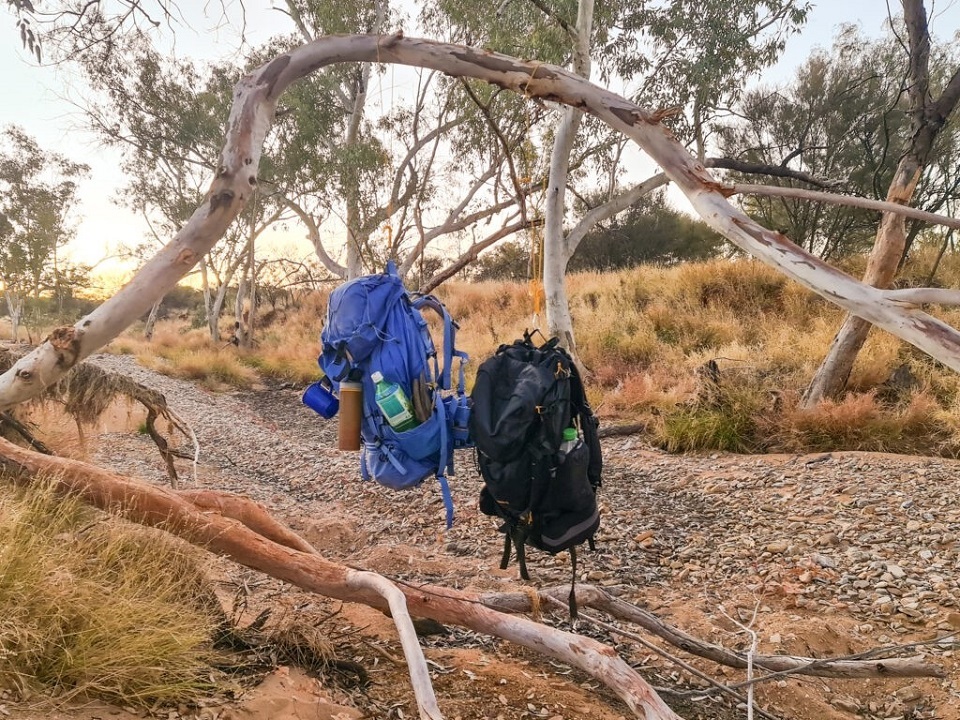
Hanging our bags in a tree each night meant the mice couldn't eat our food. (Image courtesy of All About Adventure)
Water Accessibility On The Trail
The maps that you can purchase have detailed the locations of each water tank and NT Parks and Wildlife are responsible for maintaining them. Parks states that they are unable to treat or maintain the tanks and they therefore recommend that you treat the water before consuming. We used iodine pills to do this as it was the easiest method, however you can use a filter bottle or boil the water for 5-10 minutes as well. We wouldn't recommend the boiling method as it would use too much gas, which you would also need to carry. We carried 4.5L of water each to get us 24 hours, which was used for both drinking and cooking.
HINT: Iodine tablets are sold quite cheaply at most chemists and don't take up much room or weight in the packs.
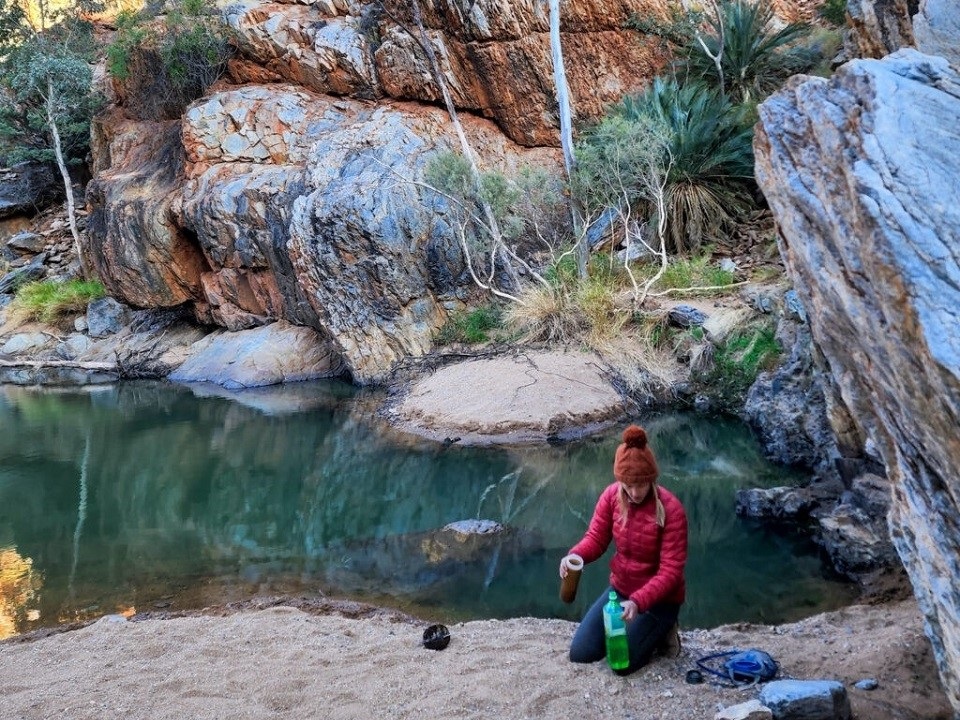
Water tanks and natural waterholes provide for your hydration, but be sure to treat the water. (Image courtesy of All About Adventure)
There are, however, at least two sections where there are no water tanks for nearly a 30km stretch. If you plan to camp between these areas as we did, rather than walk it all in one day then you will need to carry extra water. We carried 6L each on these occasions, though everyone's water consumption is different and depends on how much you require for cooking. In one of the sections we were able to carry less water as there was a small waterhole available that we filled up using our Grayl press filter bottle. Unfortunately for us, there was actually a raven that had died and was floating in the waterhole so you would always want to carefully filter this type of water as the quality can be variable.
PLEASE NOTE: You should always check again with Parks and Wildlife before starting the trail to ensure that the tanks are full as you will rely completely on this water. We were lucky to have first-hand information from a friend who had just completed the Larapinta Trail and informed us that all the tanks had water.
Other Handy Tips
- We highly recommend that you purchase the Larapinta Trail information pack for $42 from the Alice Springs Visitor Centre - it includes very comprehensive topographical maps for each section of the trail and details the designated campsites, trail heads, shelters, water tanks and toilets. As well as this, it gives great information about the geology, flora and fauna of the area and even some Indigenous cultural information. You can order it here and get it posted out to you before you travel.
- If you plan on any mountain top campsites (which we highly recommend) such as Brinkley, Counts Point or Hilltop Lookout, try and get there by 3pm or earlier as they have limited campsites and it's best to choose the most protected site from the wind. It can get very windy on these exposed campsites and it is best to check the weather and read the conditions before deciding to spend the night up there. Please note however, it can be hard to get accurate weather reports for these exact areas. Even if it is calm when you go to bed, always secure your tent thoroughly as the wind seemed to pick up in the middle of the night quite often for us.
- We would recommend getting an early start each day, even in winter, to avoid walking in the hotter afternoon. It is possible to walk at night by torch as the trail markers are reflective, however extra care should be taken on the uneven terrain and it would probably be slower going.
- Don't rely on the USB chargers at the hut. They have such small batteries that they quickly run out if someone has been charging their device first. Parks and Wildlife have plans to upgrade these but it may not happen for a few years. It's better to take your own solar panel charger and make sure to put a 240V adapter in your food drops to charge devices up fully at places like Ormiston and Standley Chasm as they don't have any there.
- You will not have very much phone service, though there are spots that have either Telstra or Optus such as the higher-up lookouts or near some of the more popular waterholes. A personal locator beacon is recommended on the trail due to the remote nature.
- You will have to hang your food in a dry bag or your entire backpack every night to keep mice from getting to your food. They will also chew silicon bowls and even the mouthpiece of your water bladder. It needs to hang from a thin rope or strong fishing line so the mice can't climb down the rope and be far enough from the ground that they can't jump up to it. We made sure to do this every night and therefore had no issues with mice, whilst others we spoke to had their belongings chewed into. It may sound like common sense, but also do not eat in your tent or very close by to your tent as that will also attract mice.
- Take a freestanding tent and make sure to have strong pegs as most campsites are very rocky and it can also get very windy. A mixture of sand pegs and stakes would be the perfect combination.
- The Larapinta Trail does not allow campfires, only fuel stove fires for cooking. You will see why, as the terrain is covered in highly flammable grasses such as spinifex or the introduced buffel grass and campfires could cause a serious bushfire in a matter of minutes. It would of course be nice to have a fire to sit by and warm up on those colder nights but for safety reasons they have not allowed them.
- We found the path to be quite well formed and sign-posted regularly. Each kilometre of the trail was labelled within each section so we always knew how far we had walked each day. In some sections the kilometre markers did become a little inaccurate or unreliably-placed but they were quite good for the most part. We personally didn't have any issues with navigation or overgrown tracks. This may not be the case every year, so always check track conditions with NT Parks and Wildlife. Our average speed would have been around 4kms per 15 minutes, however rocky creek sections would sometimes take us longer.
The Larapinta Trail Sections
Section 1 & 2 - Alice Springs Telegraph Station to Simpsons Gap (24.7km), Simpsons Gap to Jay Creek (26.2km)
Most people choose to do section 1 in a day, however we opted to have an overnighter at Wallaby Gap, as we wanted to ease into it. The first section is not a hard walk and mostly flat to start with and then heads up along the impressive Euro Ridge, named after the spiritual being in the form of a Euro that is in the indigenous Arrernte peoples' dreaming story. We spotted our first black-footed rock wallaby only 4kms in and also met an impressive 11-year-old boy that was completing the Larapinta with his dad in the opposite direction that day.
We stayed at the super-busy and fairly un-inspiring Wallaby Gap campground that had toilets, water tanks and a shelter but decided from there on to find quieter camp sites. The overnight temperature dropped to about -3°C and we woke up to frost on our tent the next morning. So safe to say, we were super grateful we had updated our gear right before this trip. We were kept nice and warm in our 2-person tent with down sleeping bags from Mountain Designs.
Unfortunately blisters were already forming by day two for Jamie but we kept our spirits high as we checked out the beautiful Simpsons Gap, a sacred area for the Arrernte people and therefore not open for swimming. After another cold night camping we kept trekking with a few peaceful rest stops at Bond Gap and Spring Gap, which both had waterholes reflecting the ruby-coloured cliff walls. We found a quiet spot to camp just before Jay Creek and had the pleasure of watching the surrounding mountain range burn in a fiery display of colours.
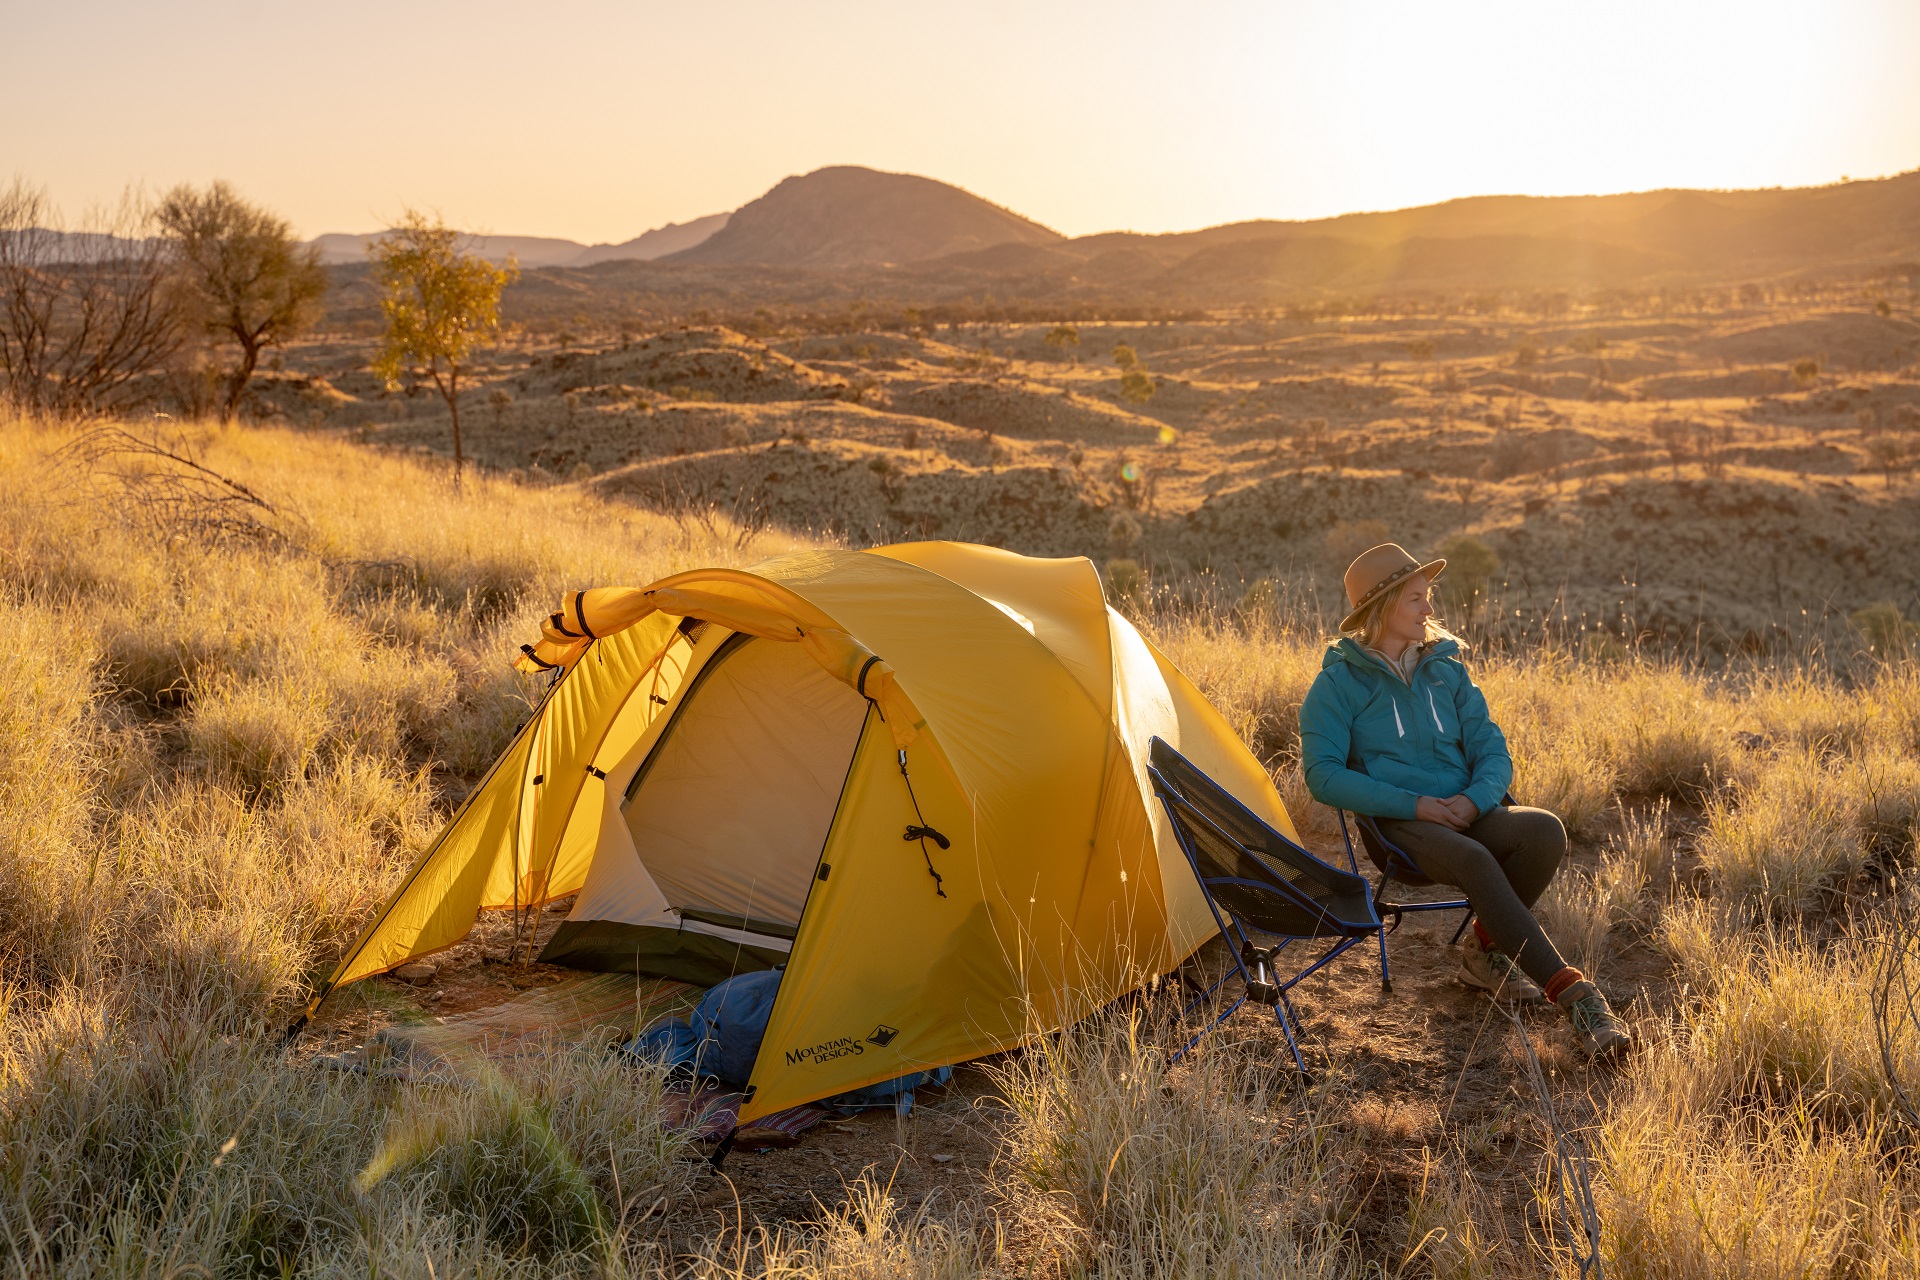
Relaxing at camp in our lightweight chairs. (Image courtesy of All About Adventure)
Section 3 & 4 - Jay Creek to Standley Chasm (13.6km), Standley Chasm to 4/5 Junction (17.9km)
The trail is an ever-changing tapestry comprising ancient, white-sand river beds dotted with cycads and steep-walled chasms and gorges. The sharp spine of the ranges brought us to scenic lookouts only to lead us down into spinifex-covered plains and then through shady gorges. The terrain had started to get more difficult through these sections with more inclines and declines and quite a bit of boulder-hopping through the creeks.
In order to avoid large groups at the camp sites (as we already had a few experiences with snorers) we made camp at the numerous unofficial cleared areas where others had previously camped. In doing so we were able to really soak in the silence of the desert landscape as the sun sunk low on the horizon and then gave way to a glittering sky of stars. The full moon shone bright for our first week on the trail bathing everything in its cool light.
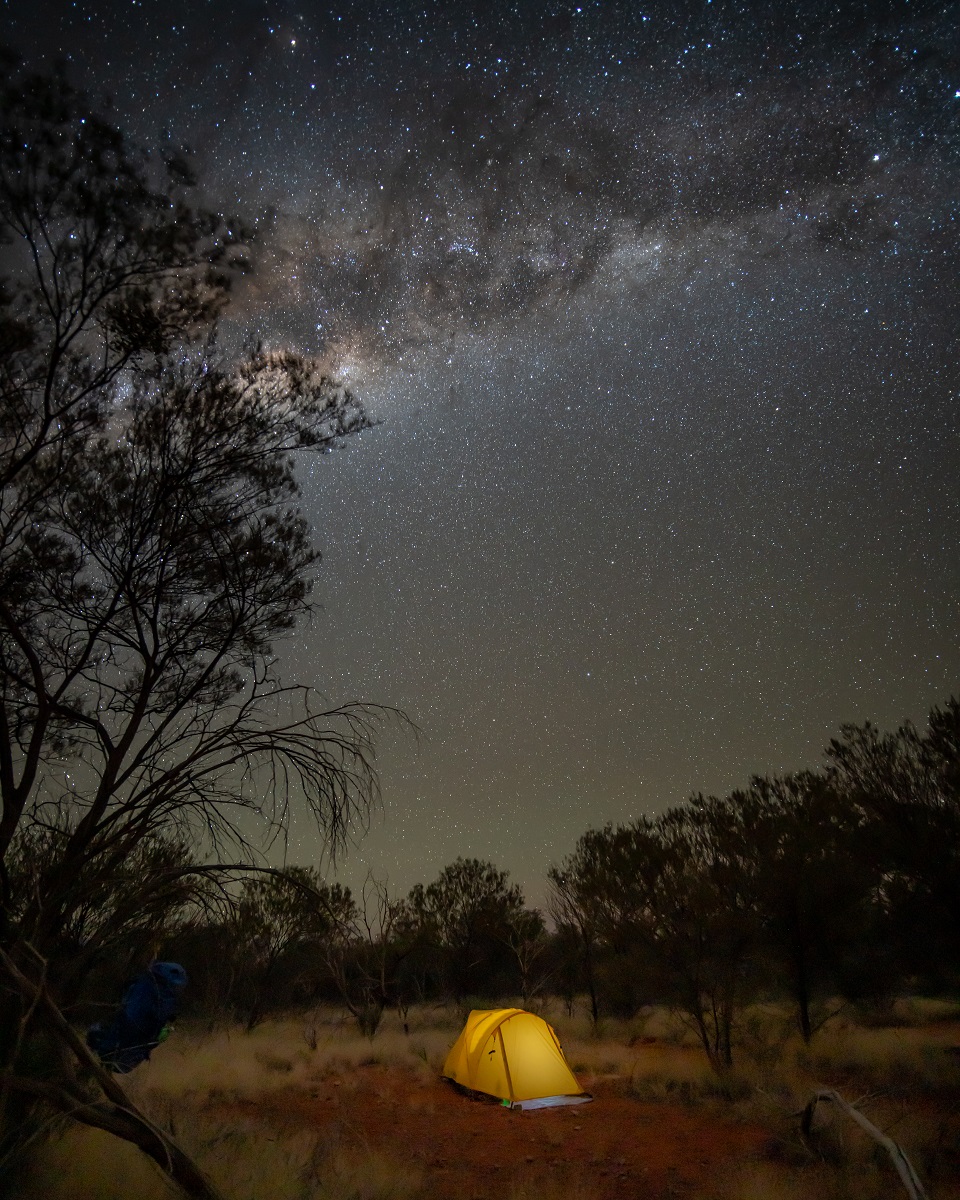
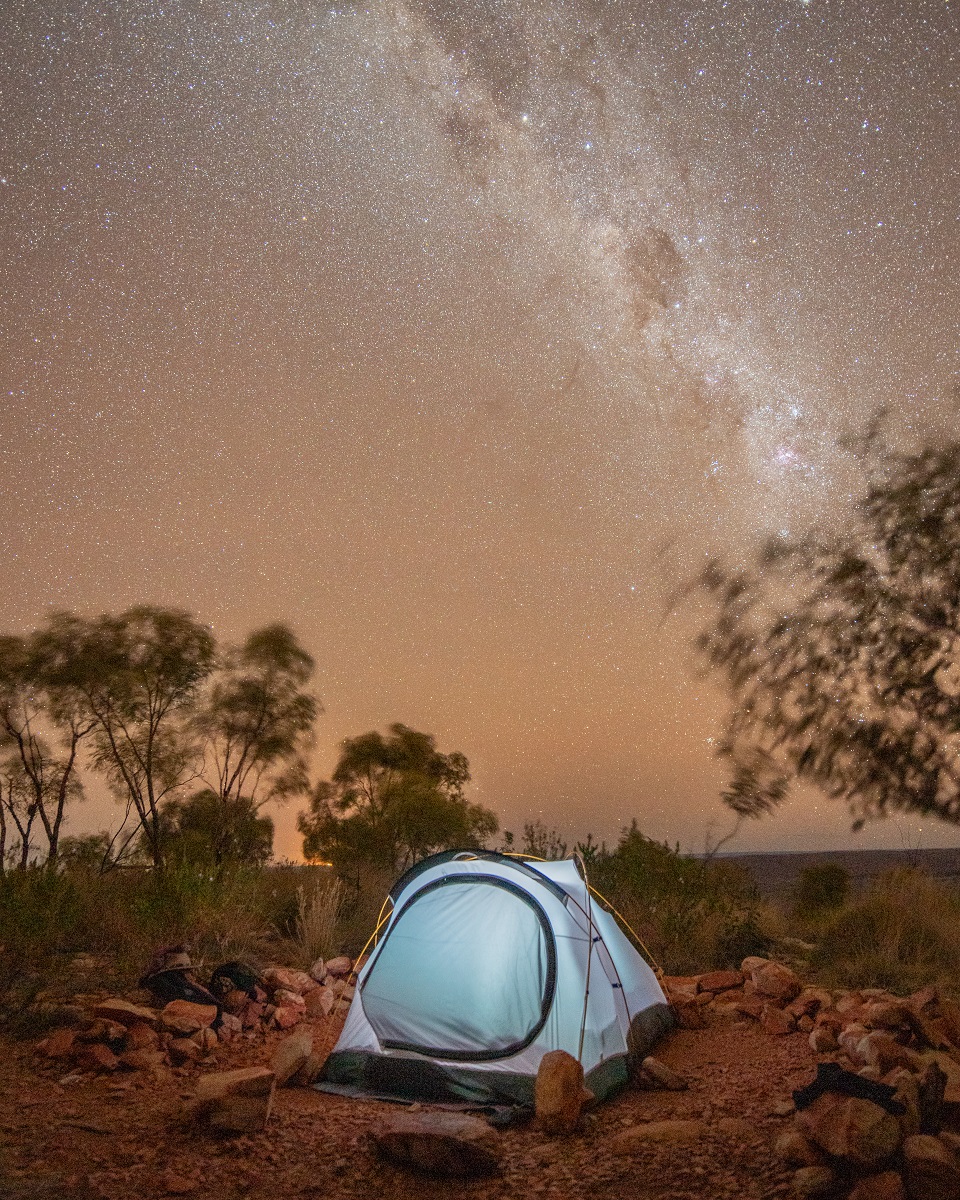
Out tent set-ups were almost always under a blanket of stars. (Image courtesy of All About Adventure)
We continued to see new species of birds endemic to this unique eco-system. Many species have adapted to the harsh arid conditions and have evolved with the skills needed to thrive out there. Standley Chasm, known by the Arrernte people as Angkerte Atwatye or 'Gap of Water' is a privately-owned and Aboriginal-run natural attraction. The trail goes right through it and most hikers use the opportunity here to visit this unique and sacred Chasm as well as utilise the free hot shower, washing machine and kiosk. We decided not to stay the night and instead picked up our first food drop, showered and had a burger at the kiosk before moving on again. Fees for entry to the Chasm and the food drop are payable direct at the kiosk and go straight back to the traditional owners.
The highlight of these sections for us was camping up high on Brinkley Bluff. We managed to arrive early enough in the afternoon to snag the most protected spot shielded with a rock wall that had sweeping views of the surrounding mountains. It is an amazing spot to enjoy the sunset but we actually preferred sunrise up there as the mountains all turned a glorious deep red as they were bathed in the days first light. As we ate breakfast we were amazed to watch a small button quail quietly pecking and scratching in the dirt only a metre from us. In order to camp at Brinkley Bluff however, we did have to carry 6L of water each up the steep incline as there is no water until ? Junction.
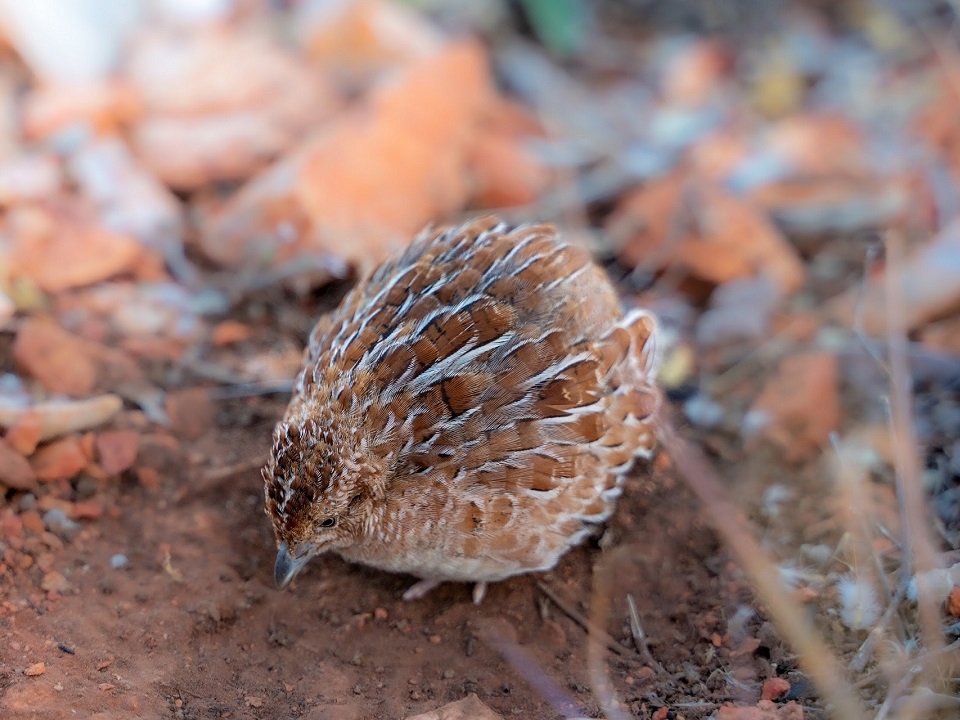
This small button quail became our little friend one morning. (Image courtesy of All About Adventure)
Section 5 & 6 - 4/5 Junction to Hugh Gorge (14.9km), Hugh Gorge to Ellery Creek North (28.9km)
These next sections were long, tough hikes with varying terrain and landscapes to pass through. Birthday Waterhole, only 400m from 4/5 Junction camp shelter looked like a great spot to camp and have a swim but we pushed on after a quick dip of our feet onto Fringe Lily Creek. There was only one other camper and so it was a nice quiet spot to spend the night. After the very steep descent from Brinkley Bluff we were happy to rest there. Although there was no water tank, there were two clear water holes which we were able to fill up from with our filter bottle.
Heading through the wide creek-bed of Hugh Gorge was a welcome treat with plenty of water holes throughout. One such waterhole is too wide and deep to go around and so you have to take your packs off and wade through with your packs above your head. We actually managed to keep our feet dry by doing a steep, slightly sketchy rock climb around the top but then I jumped in for a quick swim anyway. The water was icy-cold and turned my legs numb but it was a magnificent spot to rest and take in the towering red cliff walls of the gorge sloping into the waterhole.
The next section of the walk from Hugh Gorge campsite was long but relatively flat, passing mainly through open grasslands and slightly undulating hills. After a long day of walking we were grateful to get into Ellery Creek North just as the sun was setting. There are two options here, to walk to Ellery Creek North and stay at the Larapinta walkers campsite or to detour instead to Ellery Creek South (where a road leads in allowing cars to access it). The reason people choose to do Ellery Creek South is because you can do a food drop there. We had instead put our next food drop at Serpentine Gorge so we could experience Ellery Creek North (a spot you can only access from walking).
Once at Ellery Creek North, we set up on the sand not far from the waterhole and saw our first dingo of the trip. It had been eating the dead fish in the waterhole, leaving behind only fish heads and its glowing eyes watched back at us as we shined the torch around camp just before bed. Each year large numbers of these fish die in the waterholes due to a lack of oxygen caused by the decreasing water temperature in the winter months. It can be rather off-putting but is a natural part of life up here. That night we had an insane display of stars and an incredibly clear Milky Way we were lucky to witness before the moon came up at about 8pm and we fell into bed, exhausted.
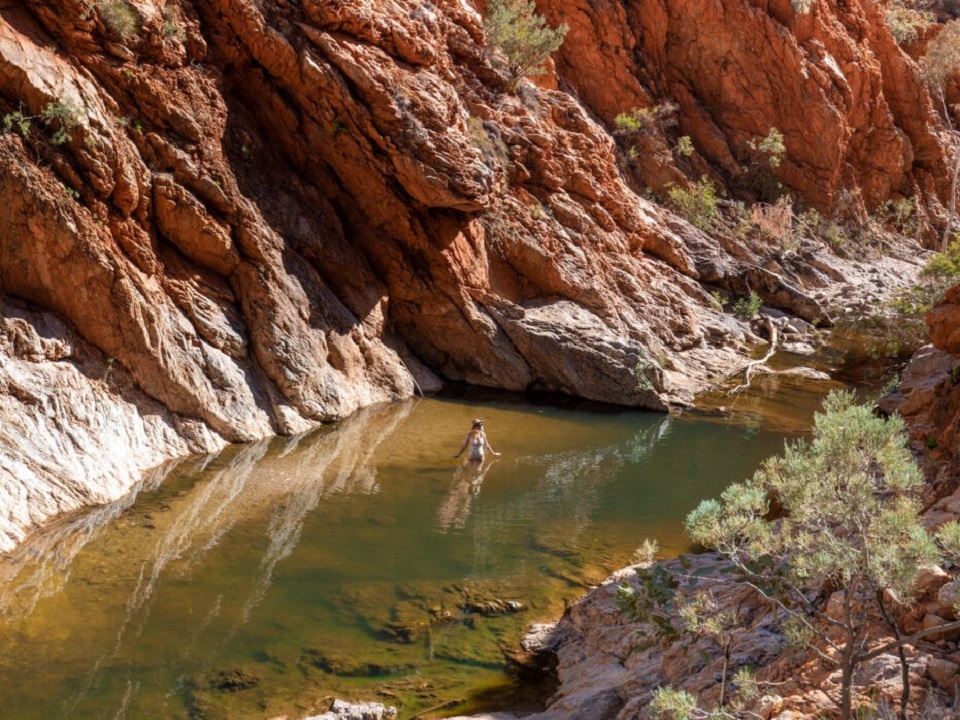
A small reprieve from the heat at Hugh Gorge. (Image courtesy of All About Adventure)
Section 7 & 8 - Ellery Creek North to Serpentine Gorge (12.8km), Serpentine Gorge to Serpentine Chalet Dam
Views of the Heavitree range accompanied us through this section, always running parallel as we walked in the foothills, occasionally crossing through gaps in the mountains. The highlight of section 7 would probably have to be collecting our food drop at Serpentine Gorge. This one is a locked shipping container left in the middle of a spinifex field, nearby to the campground. We continued walking to camp a kilometre outside of the main campground, earning us more peace and less mice around. The moon was rising ever later which allowed for some incredible stargazing once again. As the night-time temperatures were now only dropping to about 5-6 degrees we could also afford to sleep in our tent with the rain cover off and watch the stars through the mesh entrance.
With sore feet at the front of our minds we decided to kill two birds with one stone and camp at Counts Point for the next night, essentially giving us a rest day where we only had to walk 7km. The other benefit was that camping up on this incredible lookout, sitting at 1,140m was the highlight of the entire trip. We once again arrived quite early (easily done as we only had 7km to walk, albeit quite an elevation gain) and were able to score the most protected camp spot right on top.
The three other campsites filled up not long after 3pm and we were able to sit and enjoy the changing colours of one of the most unique lookouts we have been to. Leading the eye out to the west were two sharp, craggy ridgelines, and in the distance we could now spot our finish line, the impressive Mt Sonder as well as Mt Zeil, NT's highest mountain. We once again enjoyed the sunrise from this spot, though the sunset almost equalled it in beauty and serenity.
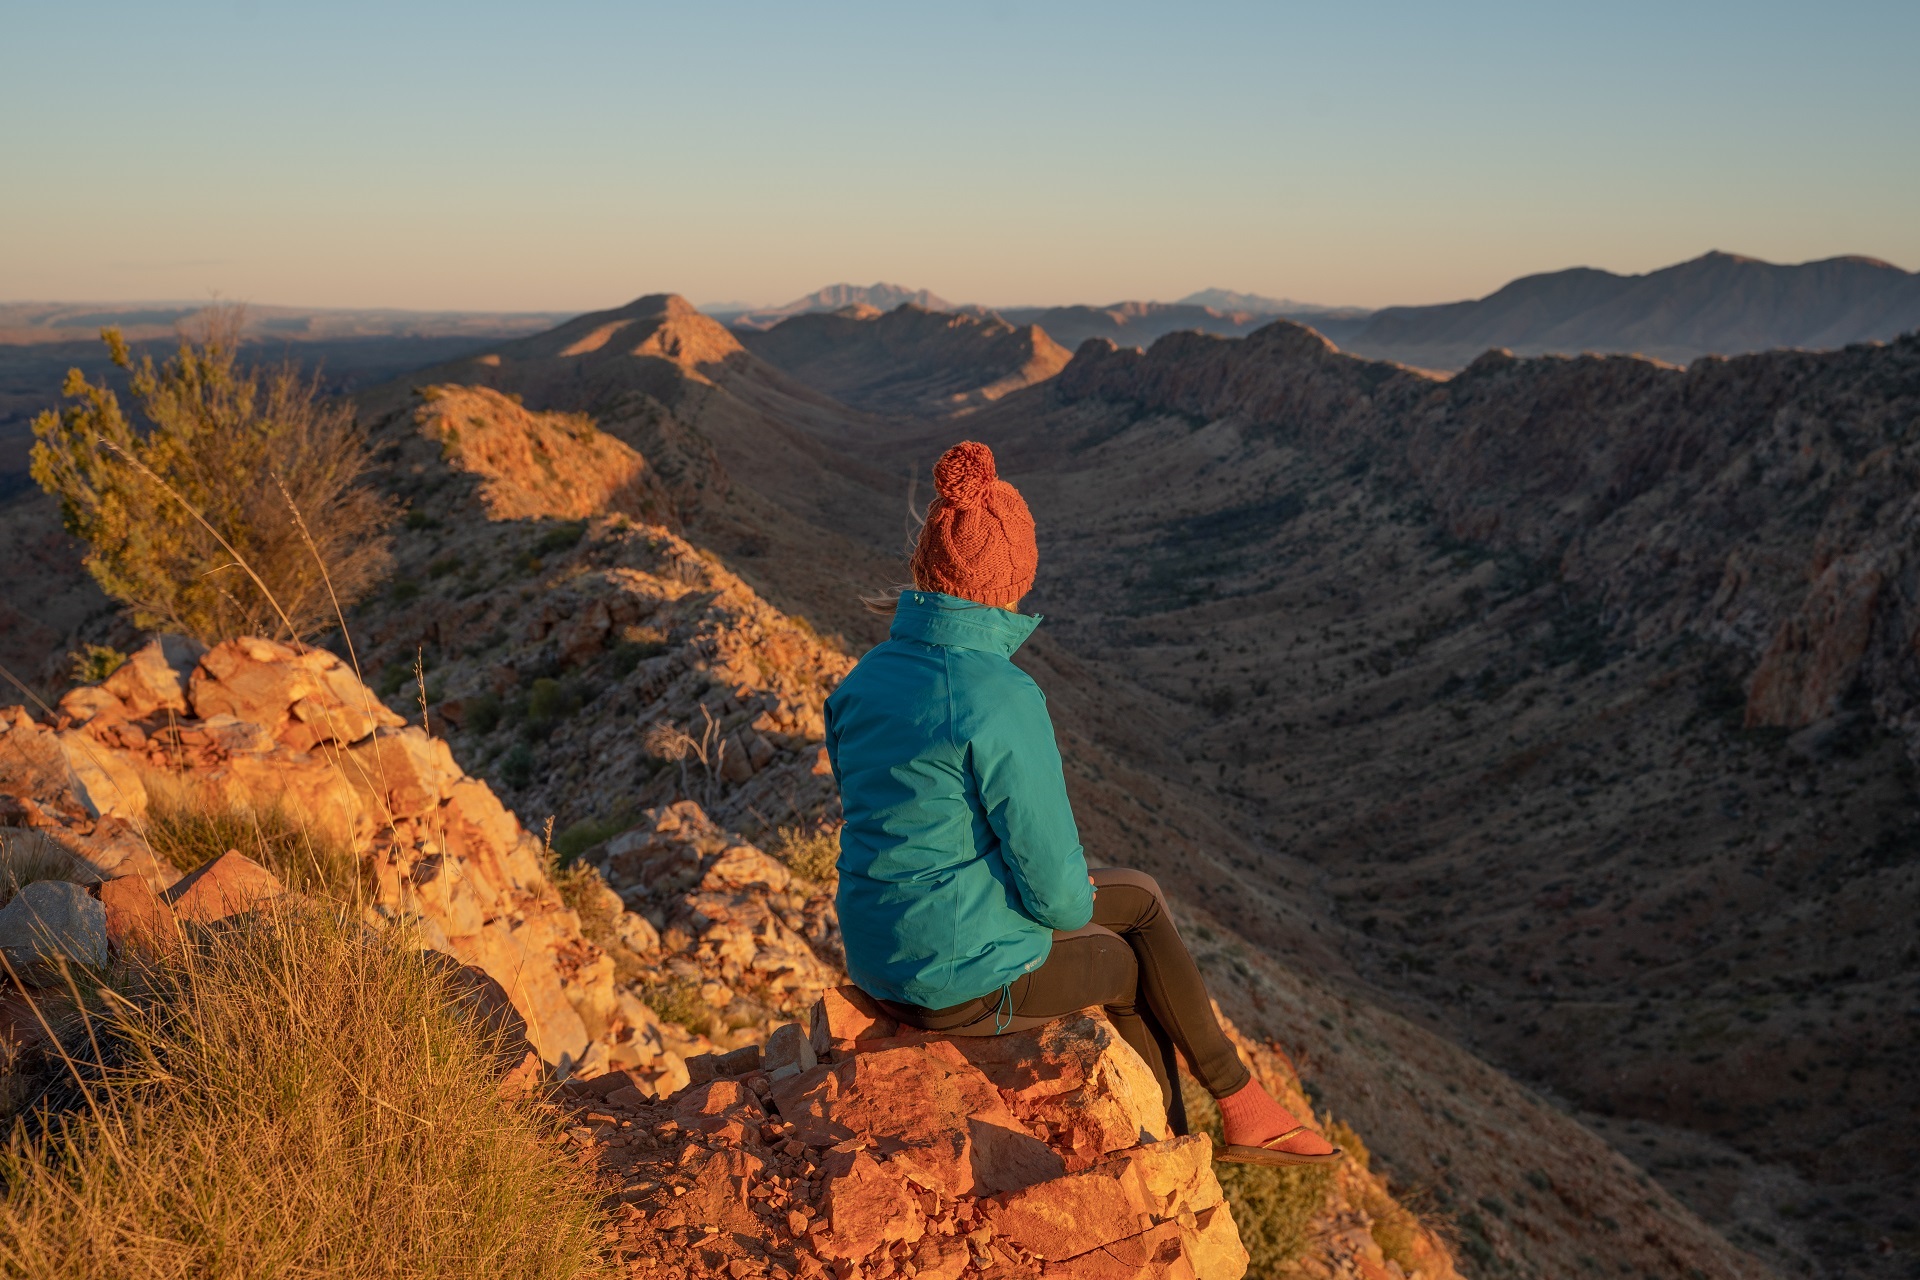
Sunrise at Counts Point, our favourite lookout campsite. (Image courtesy of All About Adventure)
Section 9 & 10 - Serpentine Chalet Dam to Ormiston Gorge (28.9km), Ormiston Gorge to Finke River (8.9km)
Section 9 of the trail is another incredibly long section, with no reliable water. Fortunately for us we were able to fill up some water at our first stop, Waterfall Gorge. However, in hindsight we probably just would have carried more water as there was a dead raven floating in the water as well as numerous small bugs. If not for our high quality filter bottle, I wouldn't even have considered this as a water source. Leaving the beautiful, shaded gully of Waterfall Gorge it was a steep ascent to get to the rewarding Giles Lookout. We left at 5:30am to arrive in time to watch the sunrise. Due to the panoramic views, we would definitely recommend camping at the top at Giles Lookout or slightly further along at Hermit's Hideaway (an unofficial campsite not pictured on any map).
After another long day we were able to walk into Ormiston Gorge, conveniently at lunch time. We immediately ordered several delicious focaccias from the kiosk as well as some scones and a berry smoothie. Feeling remarkably satisfied we proceeded to organise our third and final food drop. This one had a few treats which we also hurriedly consumed. Ormiston campground also offered us hot showers which were a very welcome treat by day 12 of our walk. Many people choose to also add on the Ormiston Pound walk which is not part of the Larapinta and is a very scenic 7km loop walk that travels through Ormiston Gorge and even has a swim-through section. Luckily for us we had done this walk before on a road trip out there so we took the opportunity to relax at camp instead.
The next morning was an early start out towards Finke River, the world's oldest river at 250 million years old. It snakes its way over 600km from the West Macdonnell Ranges out to Lake Eyre, though it only fully flows for a few days each year. One thing we noticed was that even when the water starts to recede above ground it seeps into the sand and supports a great biodiversity of plants such as the ghost gum. Riverbed camping was always our coldest due to the moisture underneath the sand that would chill throughout the night. There is a junction to head to Glen Helen, another stunning gorge with a large waterhole and a resort there that also offers meals, camping and kayak hire. Once again as we had seen Glen Helen on previous trips so we stuck to the trail and didn't need to deviate.
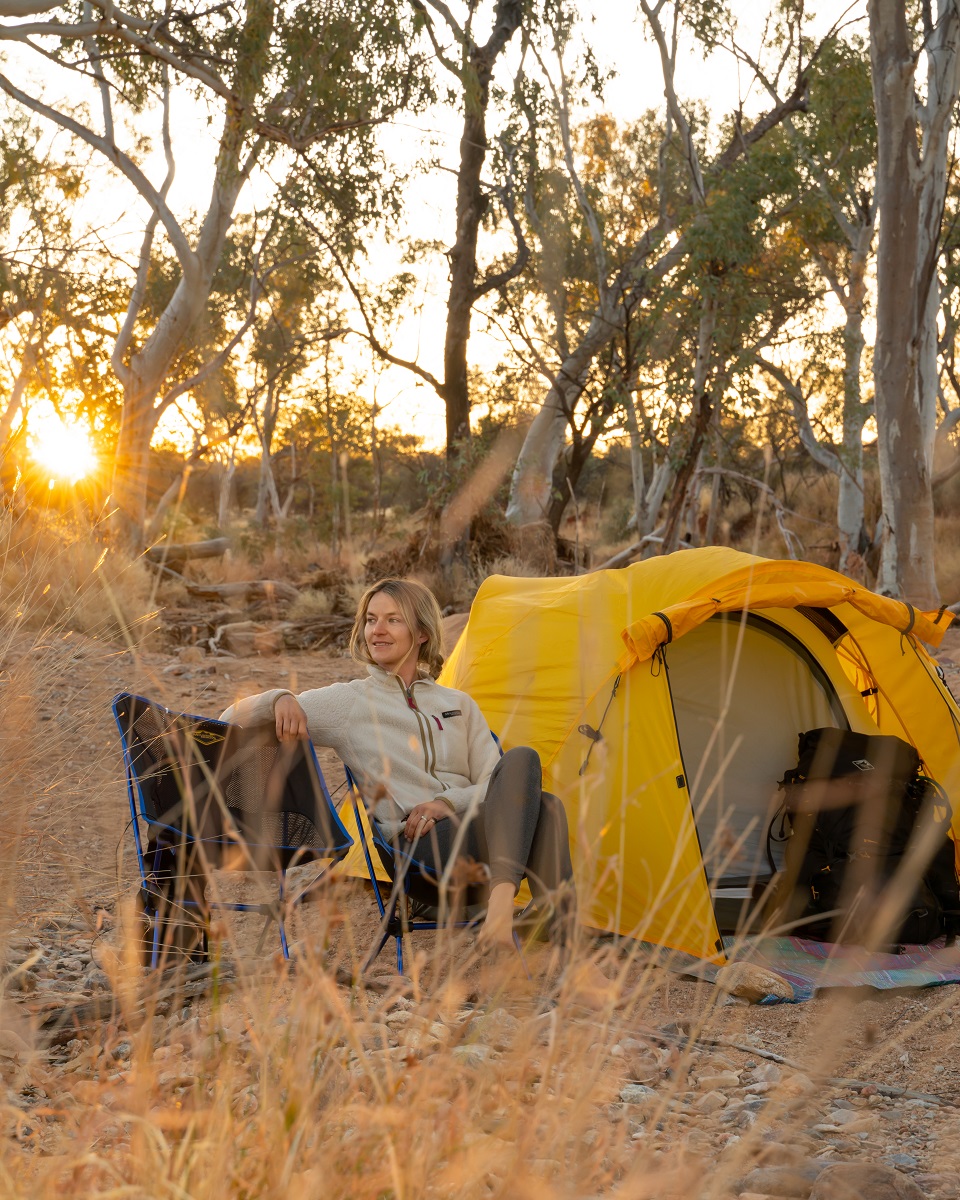
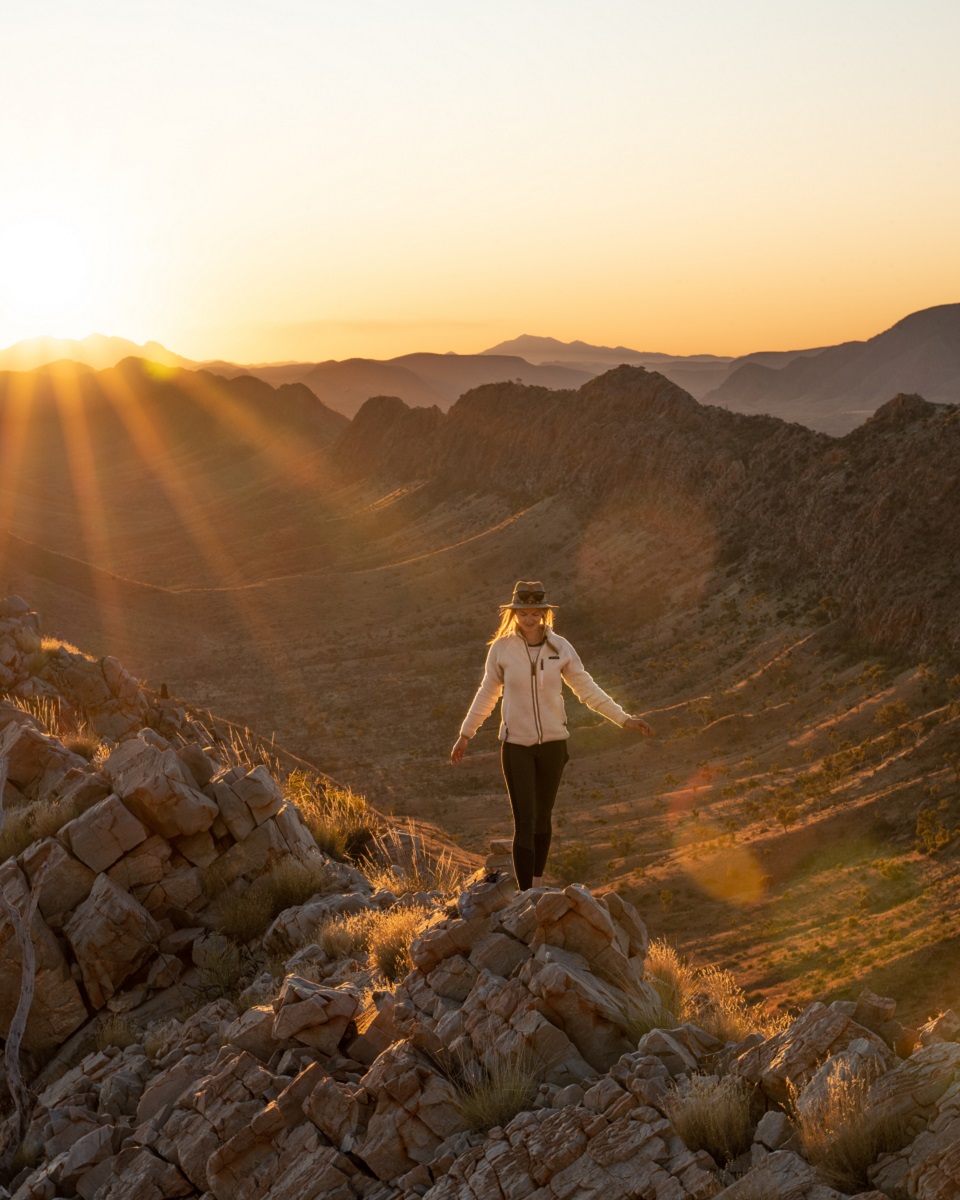
From riverbed camping to ridgeline callings. (Images courtesy of All About Adventure)
Section 11 & 12 - Finke River to Redbank Gorge (25.8km), Redbank Gorge to Mt Sonder return (16km)
As all our favourite campsites have been up high so far, we once again chose to stay up high at Hilltop Lookout. On the way, we stopped and had a long afternoon rest at Davenport Creek, a lovely sandy waterhole with frequent birds coming down for a swim or a drink. Another reason we chose to camp at Hilltop Lookout was that we wanted to get our closest view yet of the imposing Mt Sonder. Due to the Red Quartzite dominating the summits it glows an intense red at sunrise. We weren't the only ones with this idea though and we shared Hilltop Lookout with at least five other tents.
Switchbacks dominated our descent from there and then we navigated through Rocky Bar Gap, another dry creek bed between mountain ranges. The remaining 6km was slow due to our sore feet but not an overly difficult section. We arrived into Red Bank Gorge with building anticipation of our very last section, the climb to Mt Sonder's summit. You cannot reach the actual summit, sitting at 1,379m as there is no trail due to being a sacred men's only area for the Western Arrernte people, but instead the slightly lower lookout.
Redbank Gorge itself is a 1.2km walk through a rocky creek bed to get to a beautiful waterhole, hosting all kinds of wildlife particularly in the early afternoon. We have spotted black-footed rock wallabies and many birds such as the painted finches here. It was an early bed for us so that we could wake at 3:45am and leave by 4:00am the next day. Our goal was to get up to the top of Mt Sonder by sunrise and we more than accomplished that, helped by the fact that we only had to take a day bag with us. In fact, although the signs said 3.5 hours to the top we found we had done it in 2 hours and therefore had a little bit of a wait before the sky started glowing red.
It wasn't an easy walk considering it was 8km of constant uphill and we did it by the light of our head torches only. Of course as the sun started to rise, we realised what all the fuss was about. We were standing on that very quartzite we had seen lit up for the last few sunrises and we had 360° views over the trail we had just spent the last 14 days walking, as well as out to Mt Ziel and even Gosses Bluff to the south-west.
The bluff is a crater that was formed over 142 million years ago from the impact of a comet or meteorite. Standing there on top of Mt Sonder was the moment we felt the rush of achievement that comes from walking 230km carrying everything we needed on our backs. It took a moment to relish in that feeling as the first sunlight warmed our faces. We had walked the famous Larapinta Trail. Together, we had made it!
Gear List
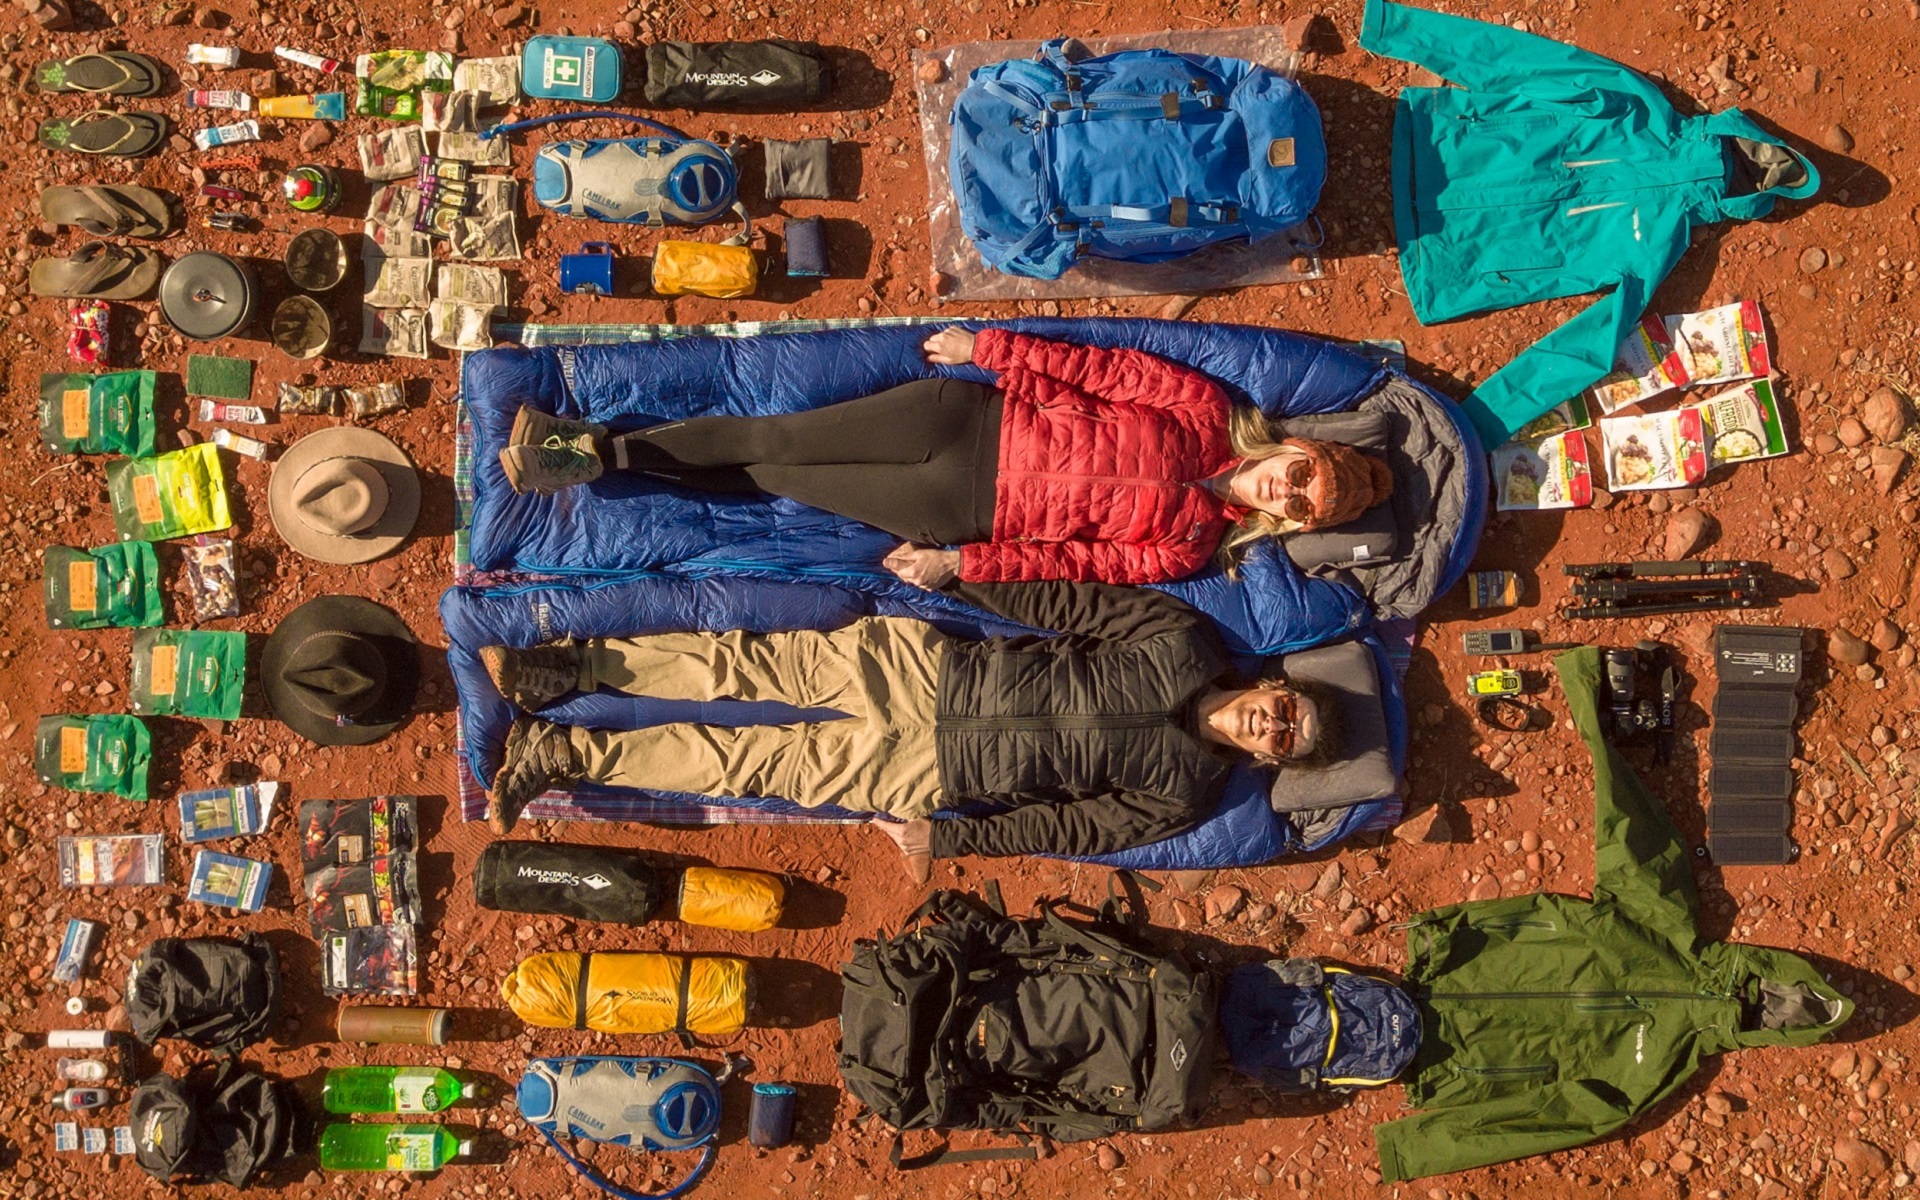
Everything we carried for the full 230km. (Image courtesy of All About Adventure)
Equipment
- 4-season free standing tent
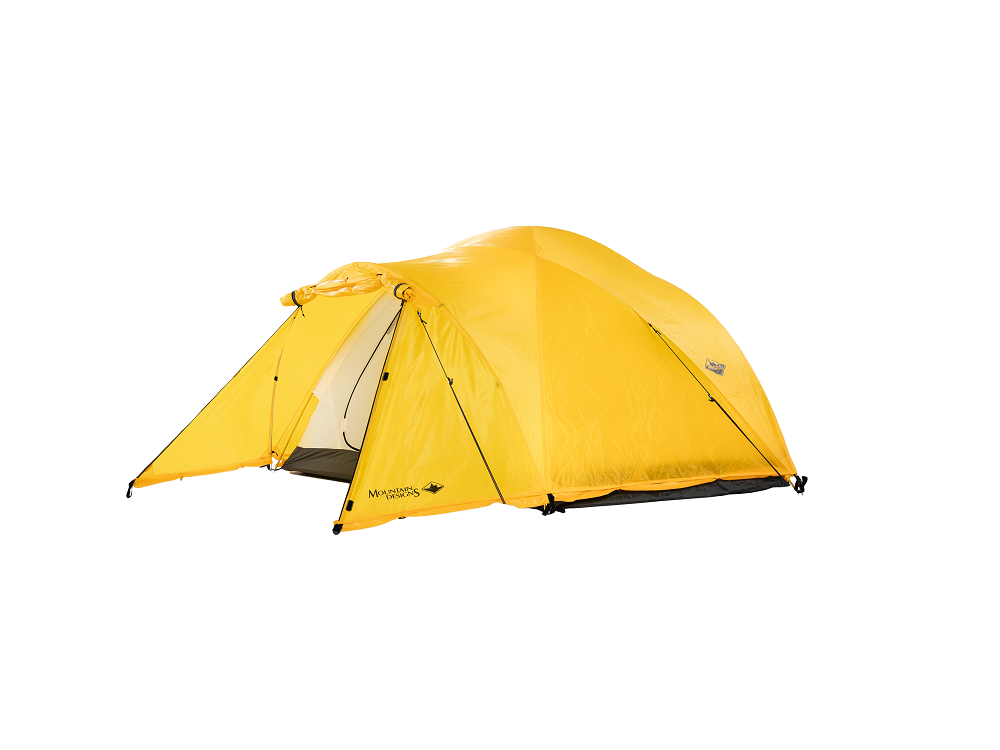
We recommend: Mountain Designs 2-Person Expedition Tent
- Sturdy hiking pack between 55-80L
We recommend: Mountain Designs X-Country 75L Technical Hiking Pack
- Small day bag
- Down sleeping bag
We recommend: Mountain Designs Travelite 700 Down Sleeping Bag
- Sleeping bag liners
- Lightweight sleeping mats
We recommend: Nemo Insulated Tensor™ Ultralight Sleeping Pad
- Hiking pillow
- Lightweight camping chairs (so you don't have to sit on rocks for two weeks' straight)
We recommend: Mountain Designs Lightweight chair
Eating & Drinking
- Cooking stove and pots
We recommend: 360 Degrees Furno Stove & Pot Set
- 2x lighters/matches
- Bowls
- 2x spoons (we actually never used forks and found spoons to be handy for any meal)
- 3L water bladder
- Spare 1.5L water bottle
- Water filtration system
We recommend: Grayl GeoPress filter bottle
- Food/snacks
We recommend: Back Country Cuisine freeze dried meals and desserts
Safety
- Comprehensive first-aid kit
- Maps & another navigation method
We recommend: Larapinta Trail information pack from Parks and Wildlife for $42 and also the Maps.me app for your phone that you can use offline
- Satellite phone
- Personal locating beacon
We recommend: ACR ResQLink 400 Personal Locating Beacon
- Head torch & batteries or charging cable
Toiletries
- Toilet kit - includes small trowel, toilet paper & small hand sanitiser
- Sunscreen
- Toothbrush & small toothpaste
- Deodorant
- Wet wipes
Tech stuff
- Charging cables
- Solar panel charger
- 240V charging adaptor
Optional:
- Camera & batteries
- Tripod
Clothing
- T-shirt
- Long-sleeve shirt
- Fleece
We recommend: Women's Mountain Designs Galena Full Zip Fleece Jacket
- Lightweight down jacket
- GORE-TEX® rain jacket (for rain and wind)
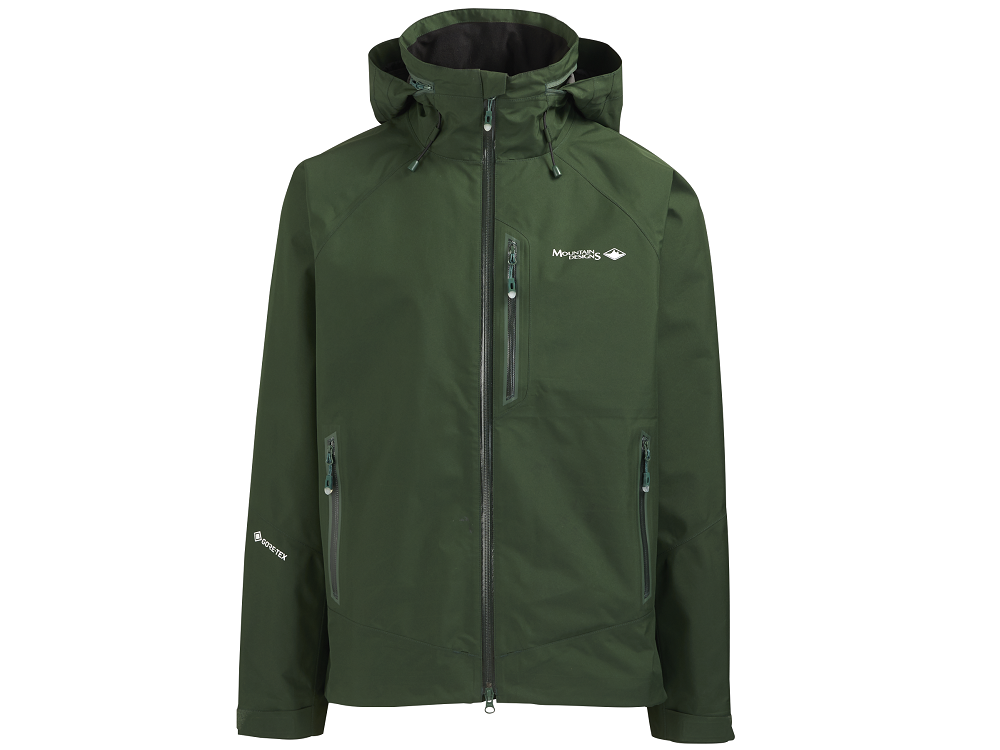
We recommend: Women's Mountain Designs Cumulus GORE-TEX® Rain Jacket & Men's Mountain Designs Cumulus GORE-TEX® Rain Jacket
- Hiking pants or leggings & shorts
- Swimsuit (for the swimming holes and swim through sections on the track)
- Underwear & socks
- Beanie
- Gloves
- Hiking boots
- Camp sandals
Photo Credits
All images supplied by All About Adventure
- Instagram @all.about.adventure
- Website https://allaboutadventure.org/
